How to Set Up a Postfix and Dovecot Auto-Responder
Learn how to configure a Postfix and Dovecot auto-responder on CentOS. This step-by-step guide will help you set up automated email replies for your mail server efficiently.
In this tutorial you will learn how to setup an auto-responder for your mail server. This guide was tested on CentOS 7.9.2009 with Postfix 2.10.1 and Dovecot 2.2.36 but should work with similar versions on any Linux distribution.
Prerequisites
- Root privileges
- A working Postfix & Dovecot setup where you can exchange mails between users successfully
Configuring Postfix & Dovecot
Install the dovecot-pigeonhole package:
1
yum install -y dovecot-pigeonhole
In the following steps, you will edit several Dovecot and Postfix configuration files. Before attempting these edits, make a backup of each file. Moreover, you will have to ensure that the settings are properly uncommented and are not overwritten elsewhere in the file.
Edit /etc/dovecot/conf.d/15-lda.conf to ensure that sieve is included in mail_plugins:
1
2
3
protocol lda {
  mail_plugins = $mail_plugins sieve
}
Edit /etc/dovecot/conf.d/90-sieve.conf to ensure that it contains the following settings:
1
2
3
4
5
plugin {
  sieve =  ~/.dovecot.sieve
  sieve_dir = ~/sieve/
  sieve_vacation_use_original_recipient = yes
}
Edit /etc/dovecot/conf.d/90-plugin.conf to ensure that it contains the following settings:
1
2
3
4
plugin {
    sieve = ~/.dovecot.sieve
    sieve_dir = ~/sieve
}
Edit /etc/postfix/main.cf to ensure that the following setting is present:
1
mailbox_command = /usr/libexec/dovecot/deliver
Restart your mail services:
1
systemctl restart dovecot postfix
Create an Auto-Responder Script
First view the list of users recognized by Dovecot:
1
doveadm user '*'
Suppose you want to create an auto-responder for an existing user john.
Navigate to his home directory:
1
cd /home/john
Create a sieve directory:
1
mkdir -p sieve
Using your code editor, create a new file sieve/vacation.sieve:
1
vi sieve/vacation.sieve
Paste the following contents:
1
2
3
require ["vacation"];

vacation :days 1 :addresses ["john@csft.mu"] :subject "Out of Office" "I am currently out of the office.";
:days sets the interval between automatic replies to the same sender. If set to 1, the auto-responder will send only one reply per sender per day, preventing multiple responses to frequent emails.
:addresses should specify the email address that sends the auto-reply. This is typically the same as the recipient’s email.
Save and exit the file.
Compile the sieve script and create a symbolic link to the script:
1
2
sievec sieve/vacation.sieve
ln -s sieve/vacation.sieve .dovecot.sieve
Give appropriate permissions to the sieve:
1
2
3
chown -R john:john /home/john/sieve
chmod -R 700 /home/john/sieve
chmod 600 /home/john/sieve/vacation.sieve
Check if vacation is active for john:
1
doveadm sieve list -u john
You should see vacation ACTIVE as output.
How it works
- When a new email arrives, Dovecot looks for
~/.dovecot.sieve. - If
~/.dovecot.sieveis a symlink, it follows the link to a script inside~/.sieve/. - The active script is executed, processing the email based on the Sieve rules.
Testing auto-reply
To check if auto-reply is working send an email to john@csft.mu from another pre-existing account say tom@csft.mu. tom@csft.mu should receive an auto-reply and the reply is sent only once in the number of configured days.
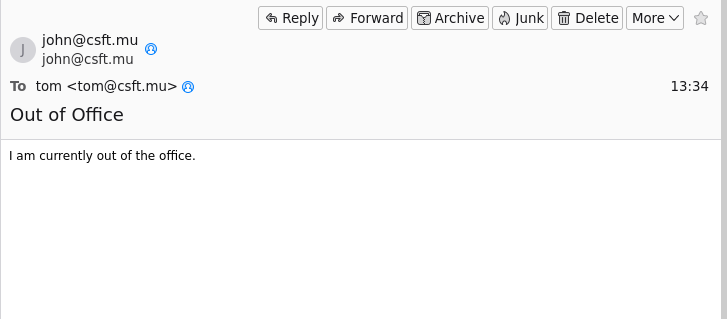 Auto-reply from John on Thunderbird
The list of auto-replied senders is stored in the .dovecot.lda-dupes file in the user’s home directory. When you are testing the auto-reply feature, remember that the reply is sent only once in the number of configured days. You can delete this file to test the vacation reply multiple times.
Troubleshooting
Check if your Postfix configurations have no errors:
1
postfix check
If there are no errors, you should not see any output.
Restart Dovecot and Postfix:
1
systemctl restart dovecot postfix
Assuming you have rsyslog installed, check your mail logs for error messages related to sieve:
1
cat /var/log/maillog | grep sieve
If you do not have rsyslog, install it using yum install -y rsyslog and send emails again before verifying the logs.
Reset list of auto-replied senders
If tom@csft.mu is not receiving auto-replies from another user who has vacation activated, delete /home/tom/.dovecot.lda-dupes.
Check account name
Some account names (e.g. root, support) are restricted and consequently emails are redirected to another user.
Check if there is an alias redirecting your mail account (e.g. support):
1
grep support /etc/aliases
If you see something like:
1
support:        postmaster
That means emails sent to support@csft.mu are redirected. In this case you can try modifying /etc/aliases and then run:
1
2
newaliases
systemctl restart postfix dovecot
Check domain name
The domain name of your mail server may not match the domain name of the email address. In this case you will get a warning in /var/log/maillog telling you that the the original envelope recipient address is unparsable.
Check the domain name of your server using:
1
hostname -d
If you are sending emails to <user>@csft.mu, the domain name of your server should be csft.mu.
To update the fully-qualified name of your server:
1
hostnamectl set-hostname mail.csft.mu